
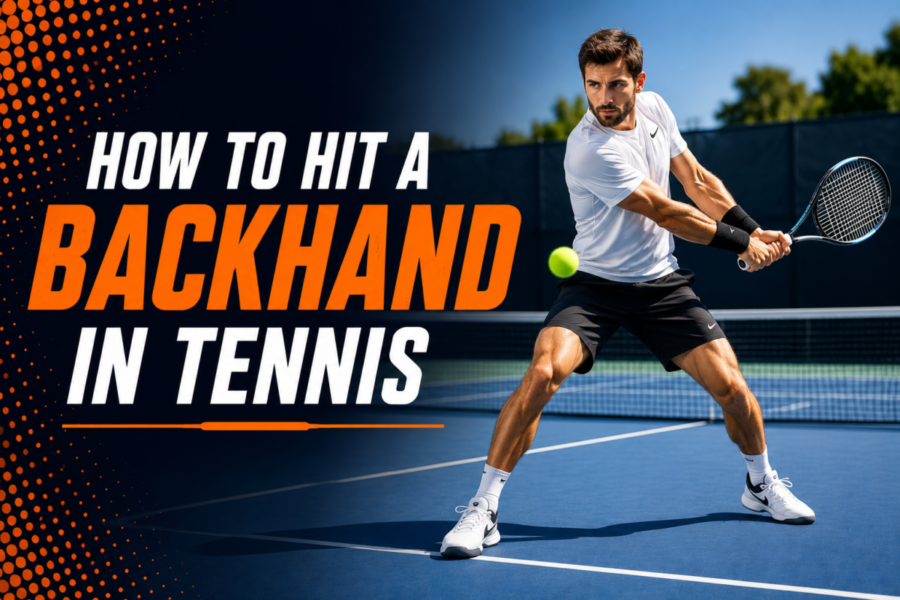
The backhand is one of the two main groundstrokes in tennis, alongside the forehand. It is played from the non-dominant side of the body, which is the left side for a right-handed player and the right side for a left-handed player.
Players can use either a one-handed or two-handed backhand. The two-handed backhand is more common because it provides additional stability, control, and support when returning powerful shots. It is also generally easier for beginners to learn because the non-dominant hand plays a major role in controlling the racket.
Although the backhand can initially feel less natural than the forehand, it can become a highly dependable shot with the correct grip, preparation, footwork, contact point, and follow-through.
For a complete backhand fix check out The Tennis Backhand Fix.
One-Handed vs Two-Handed Backhand
A one-handed backhand uses only the dominant hand throughout the swing. It provides greater reach and can make it easier to hit slices and low balls, but it requires excellent timing, strength, and preparation.
The two-handed backhand uses both hands on the racket. It provides greater stability at contact and makes it easier to control high balls, return fast serves, and redirect powerful groundstrokes.
Neither version is automatically better, but the two-handed backhand is normally the more practical choice for beginners. This guide focuses on how to hit a two-handed backhand.
For more information on this topic read Two-Handed Backhand vs. One-Handed Backhand in Tennis.
Backhand Grip
The correct backhand grip creates a stable racket face and allows both hands to contribute to the stroke.
For a right-handed player, the dominant right hand should hold the bottom of the handle using a Continental grip. The non-dominant left hand is placed directly above it using an Eastern forehand or Semi-Western forehand grip.
A left-handed player uses the opposite arrangement. The left hand holds the bottom of the handle with a Continental grip, while the right hand is placed above it in an Eastern or Semi-Western position.
The hands should sit close together without overlapping. Avoid leaving a large gap between them because this can make the racket feel unstable.
The dominant hand provides support, stability, and guidance. The non-dominant hand contributes much of the acceleration and controls the racket through the hitting zone. A useful way to understand the stroke is to imagine that the non-dominant hand is hitting a forehand while the dominant hand supports the motion.
Backhand Ready Position
Every backhand begins from a balanced tennis ready position. Stand with your feet slightly wider than shoulder-width apart, bend your knees, and keep your weight toward the front of your feet.
Hold the racket in front of your body with both hands. The racket head should remain raised so that you can react quickly to either side.
As your opponent strikes the ball, perform a split step. This small jump helps you land in a balanced position and move quickly toward the incoming shot.
As soon as you recognize that the ball is coming to your backhand side, begin turning your shoulders. Early preparation gives you more time to move into position and prevents the stroke from becoming rushed.
Use an Early Unit Turn
The first major movement is the unit turn. Instead of pulling the racket back with the arms alone, rotate the shoulders, torso, arms, and racket together.
For a right-handed player, the left shoulder should turn toward the incoming ball. For a left-handed player, the right shoulder leads the rotation.
Keep both hands on the racket during the preparation. The racket should move back as part of the shoulder turn rather than being lifted independently by the arms.
A good unit turn creates upper-body rotation while keeping the arms relaxed. It also helps disguise the direction of the shot because the racket remains in a consistent preparation position.
Late preparation is one of the most common causes of a weak backhand. Begin the unit turn as soon as you identify the direction of the ball, even before you have completed your movement toward it.
Backhand Footwork and Stances
Good tennis footwork allows you to create the correct distance from the ball and maintain balance throughout the stroke. The backhand can be hit from several stances depending on your position and the amount of time available.
Neutral Stance
The neutral stance is often the easiest stance for beginners. A right-handed player steps forward with the right foot, while a left-handed player steps forward with the left foot.
This position allows the body to transfer weight from the back leg toward the front leg. It is especially useful when hitting a comfortable ball from a central position or moving forward to attack a shorter shot.
Closed Stance
In a closed stance, the front foot crosses slightly beyond the back foot. This can help players reach wide balls, but an excessively closed position may restrict hip rotation and slow recovery.
Use the closed stance when necessary, but avoid stepping so far across the body that you lose balance.
Open Stance
The open stance is used when there is not enough time to step across. The player loads the outside leg and generates power through rotation rather than forward weight transfer.
This stance is common when returning fast serves or defending against deep shots. It allows quicker recovery but requires good balance and lower-body strength.
No single stance should be used for every backhand. The correct choice depends on the ball’s speed, height, depth, and location.
Backhand Backswing
Once the unit turn is complete, the racket moves into the backswing. The racket head should remain above or around the height of the hands during the early part of the preparation.
The backswing should be compact. Taking the racket too far behind the body makes timing more difficult and increases the risk of contacting the ball late.
Keep the arms relaxed and allow the shoulders to complete most of the preparation. The front shoulder should remain turned toward the ball while the head stays level.
As the forward swing begins, the racket head drops below the expected contact point. This creates the low-to-high path needed to produce topspin.
Avoid forcing the racket downward with the wrists. The racket drop should happen naturally as the body begins to rotate forward.
Load the Legs
The legs provide the foundation of the backhand. Bend the knees as you move into position and load your weight through the ground before beginning the forward swing.
When using a neutral stance, the weight usually begins on the back leg and transfers toward the front leg. In an open stance, the player pushes against the outside leg and rotates through the shot.
The knees should extend as the racket moves toward contact, particularly when dealing with a lower ball. This helps lift the ball over the net without relying entirely on the arms.
Do not stand upright throughout the stroke. A high body position reduces balance and makes it harder to adjust to different contact heights.
Backhand Contact Point
The ideal contact point is in front of the body and slightly to the side. A right-handed player contacts the ball in front of the left hip, while a left-handed player makes contact in front of the right hip.
The exact contact position can vary according to the grip and the height of the ball, but the ball should not be allowed to travel behind the body. Late contact makes it difficult to control the racket face and often causes the shot to drift wide or land short.
Keep enough distance between your body and the ball for the arms to extend comfortably. Standing too close forces the elbows into the body and restricts the swing.
At contact, the racket face should be stable and directed toward the intended target. The wrists should remain controlled rather than flicking or rolling aggressively.
Your head should remain still, with your eyes focused on the contact area. Looking toward the target too early can cause the shoulders to open and pull the racket away from the ball.
The Role of the Non-Dominant Hand
The non-dominant hand is extremely important on a two-handed backhand. It contributes much of the acceleration and helps guide the racket through contact.
For a right-handed player, the left arm extends through the ball in a motion similar to a left-handed forehand. For a left-handed player, the right arm performs the same role.
Avoid allowing the dominant hand to control the entire stroke. When the bottom hand becomes too active, the swing may feel stiff and the racket face can become unstable.
A useful drill is to practise short backhands using only the non-dominant hand. This helps you understand how the upper hand drives the racket forward and upward.
When both hands return to the handle, try to maintain that same feeling while allowing the dominant hand to provide support.
Swing Low to High
A topspin backhand uses a low-to-high swing path. The racket begins below the ball and then moves upward and forward through contact.
This brushing action creates topspin, helping the ball rise over the net before dipping back into the court. Topspin allows players to swing with greater speed while maintaining control.
However, the racket should not travel only upward. The swing must also extend forward toward the target. Brushing too vertically can create a weak ball with plenty of spin but little depth.
The ideal swing combines forward extension with upward movement. Drive through the ball first, then allow the racket to rise naturally as the body completes its rotation.
Body Rotation
Power on the backhand should come from the legs and torso, not only from the arms. The body begins in a turned position and gradually rotates toward the net during the forward swing.
The hips and shoulders should not open too early. If the body rotates before the racket begins moving forward, the arms may be left behind and contact will occur late.
Allow the lower body to begin the movement while the arms remain relaxed. The torso then rotates as the racket accelerates toward the ball.
The body should remain balanced throughout the stroke. Falling backward reduces power and often causes the ball to land short.
Backhand Follow-Through
After contact, continue extending the racket toward the target before allowing it to rise across the body. A right-handed player usually finishes with the racket over the right shoulder, while a left-handed player finishes over the left shoulder.
The elbows should finish comfortably raised, and the chest should rotate toward the net. The back foot may release naturally as the hips and torso complete the movement.
Do not stop the racket immediately after contact. A restricted follow-through reduces racket-head speed and makes the stroke feel forced.
The finish may change depending on the height and intention of the shot. A defensive backhand may finish higher, while a flatter attacking backhand may extend farther through the court.
Recover After the Backhand
The stroke is not complete until you have recovered for the next ball. After the follow-through, bring the racket back in front of the body and move toward the appropriate recovery position.
Use quick side steps or a crossover step when returning toward the center of the court. Avoid standing still and watching the shot after contact.
Your recovery position depends on where you hit the ball. A deep crosscourt backhand may allow you to recover closer to the center, while a wide defensive shot may require a faster movement back into the court.
Perform another split step as your opponent prepares to strike the next ball.
Also read 5 Common Backhand Mistakes in Tennis.
How to Practise the Backhand
Begin with shadow swings to develop the grip, unit turn, racket drop, contact point, and follow-through. Move slowly and focus on maintaining balance throughout the motion.
Next, practise with gentle hand-fed balls. Start from a neutral stance and aim for clean contact rather than maximum speed.
Once the basic swing feels comfortable, introduce movement. Alternate feeds between the forehand and backhand sides so you learn to prepare early and adjust your footwork.
Wall practice is useful for developing repetition and control. Begin close to the wall and hit slowly before gradually increasing the distance and pace.
You can also practise crosscourt and down-the-line targets. Crosscourt backhands provide a larger margin for error, while down-the-line shots require more precise timing and control.
Recording the stroke from behind and from the side can help identify problems with preparation, spacing, contact, and balance.
Final Thoughts
Learning how to hit a backhand in tennis requires early preparation, efficient footwork, correct spacing, and a smooth swing. For a two-handed backhand, use a Continental grip with the dominant hand and an Eastern or Semi-Western grip with the non-dominant hand.
Turn the shoulders early, keep the backswing compact, drop the racket below the ball, and make contact in front of the body. Allow the non-dominant hand to guide the racket while the legs and torso provide support.
Focus on consistency and clean contact before trying to add more speed. With regular practice, the backhand can develop from a defensive weakness into one of the most dependable shots in your game.