
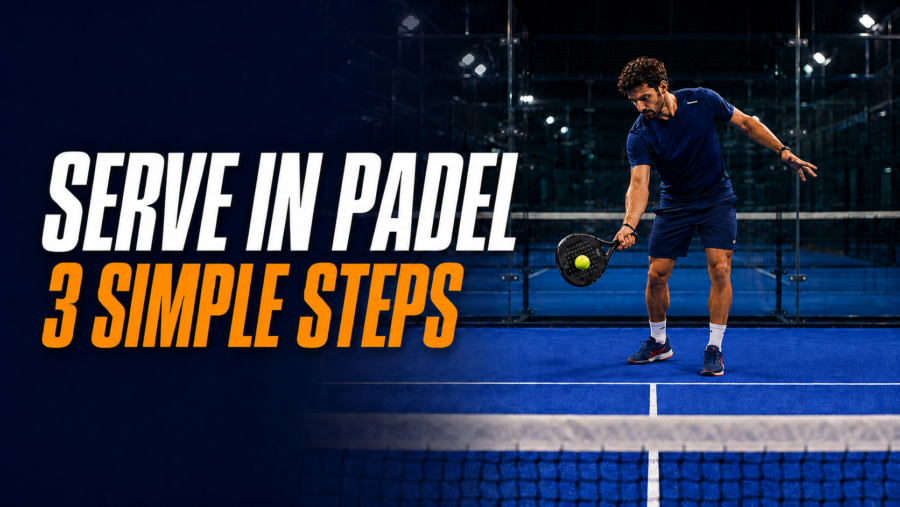
A legal padel serve is simple: set up behind the service line, bounce the ball in the correct serving area, strike it at or below waist level into the diagonal service box, then move forward for the return. Unlike a tennis serve, it is an underhand shot rather than an overhead motion.
The serve is mainly a setup shot. Consistent placement and enough time to reach a useful court position usually matter more than maximum speed. If you are new to the sport, it helps to learn these serving basics alongside the wider guide on how to start playing padel.
Padel Serve Rules at a Glance
Before working on technique, make sure your serve is legal:
- Begin each service game from the right side and serve diagonally into the receiver’s left service box. Alternate sides after every point.
- Keep both feet behind the service line and clear of the line and imaginary center-line extension until contact. At least one foot must remain on the ground when you strike the ball.
- Bounce the ball inside your corresponding serving area. Before contact, the ball must not cross the service line or the imaginary center-line extension.
- Strike the ball at or below waist level.
- The ball must land in the diagonal service box. A ball touching one of that box’s lines is in.
- You have two serve attempts. Two consecutive faults lose the point.
- After a legal bounce in the service box, contact with glass is allowed. Contact with the metal fence before the second bounce makes the serve a fault.
- If the serve touches the net or net post and then lands correctly, it is normally replayed as a let. It is a fault instead if it subsequently touches the metal fence before the second bounce.
These are the serving essentials. The basic rules of padel explain scoring, service order and the rest of the game in more detail.
How to Serve in Padel in 3 Simple Steps
Step 1: Set Up Behind the Line
Stand in the correct half of the court, behind the service line. A slightly side-on stance makes it easier to rotate and transfer your weight forward. For a right-handed player, the left foot can sit slightly ahead of the right. Reverse this for a left-handed player.
Hold the racket with a relaxed continental grip, often described as a hammer grip. This grip is not required by the rules, but it provides a stable racket face and makes it easier to add light slice later.
Choose your target before starting the motion. Keep your knees soft, your upper body relaxed and your weight slightly more on the back leg. A compact preparation beside or just behind the hip is easier to repeat than a large tennis-style backswing.
Step 2: Drop and Bounce the Ball
Release the ball gently so it bounces slightly in front of you and toward your racket side. Do not throw it high like a tennis serve. A simple, repeatable drop gives you better control over the contact point.
The bounce must remain inside the legal serving area, so avoid dropping the ball too close to either boundary. Leave enough space to swing without crowding your body, but do not reach so far that you lose balance.
Try to make the bounce nearly identical on every serve. If it rises too high, wait for it to descend to a legal contact height. If it stays very low, adjust the release rather than bending into an awkward, rushed swing.
Step 3: Swing, Contact and Move Forward
Swing smoothly forward from the compact preparation. Rotate your torso, transfer weight toward the front foot and keep the wrist stable through contact. Strike the ball in front of your body at or below waist level, directing the racket face toward the chosen target.
Use a controlled follow-through rather than stopping the racket at contact. The motion should feel compact and balanced, with enough pace to reach good depth without pulling you off the court.
After serving, move forward under control and join your partner in a useful attacking position. Split-step as the receiver prepares to strike, rather than running blindly through the return. Good volley technique will help you handle the next ball, while working effectively with your partner keeps the middle and passing lanes covered.
Where Should You Aim the Serve?
Three simple targets give you useful variety:
- Down the T: A serve toward the center line can reduce the receiver’s angles and make the next ball easier to anticipate.
- At the body: A serve into the receiver’s movement path can make a comfortable swing more difficult.
- Wide: A deep serve toward the side glass can produce an awkward rebound, particularly when the receiver is uncomfortable using the wall.
None of these targets is automatically best. Notice the receiver’s position, preferred side and movement, then vary the placement so they cannot settle into one return pattern. Depth is useful, but accuracy comes first because a serve that clips the metal fence after its first bounce is a fault.
Should You Serve Flat or With Slice?
Beginners should first build a reliable flat or lightly controlled serve. Once the contact point is consistent, a small amount of slice can keep the rebound lower and change its path after the glass.
Create slice with a smooth brushing action and a stable racket face. Avoid a sharp wrist flick or steep chopping motion, which often reduces control. Slice is an option, not a legal requirement, and a well-placed flat serve can be just as useful.
Common Padel Serve Mistakes
- Contacting above the waist: A comfortable high contact is still a fault if it is above waist level.
- Crossing a boundary too early: Keep your feet, the bounce and the ball within the correct serving area until contact.
- Using an inconsistent release: A high toss or changing bounce position makes timing harder than necessary.
- Taking an oversized backswing: A long motion adds moving parts and can delay recovery toward the net.
- Serving only for speed: Excessive pace increases errors and can bring the return back before you establish position.
- Watching the serve instead of recovering: Move after contact, then become balanced before the receiver strikes.
A Simple Serve Practice Drill
Place three large targets in the diagonal service box: one near the T, one in the body zone and one wide. Hit 10 serves to each target from both serving sides.
During the first round, count only legal serves that land in. During the second, score whether the ball reaches the intended target area. Add more pace or light slice only after the bounce, contact height and placement remain consistent.
Use one cue for the whole motion: set, bounce, strike and move. A serve that is legal, repeatable and followed by balanced court positioning is already doing its job.