
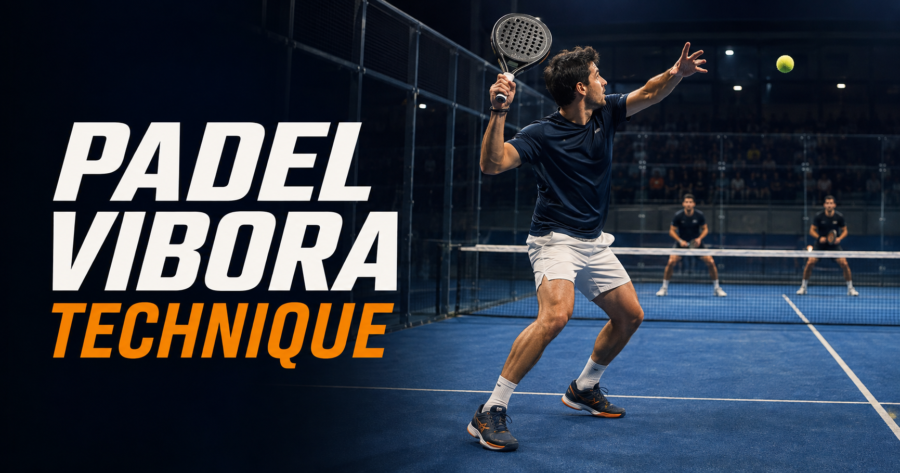
The vibora is an attacking overhead that combines controlled pace with pronounced sidespin. It is usually played against a manageable lob while you are still close enough to the net to contact the ball in front and to the side of your body.
A successful vibora travels quickly, stays low after the bounce and becomes difficult to read when it reaches the glass or fence. It can produce a winner, but its more reliable purpose is to force a weak upward reply while allowing you to retain the net.
The shot is more aggressive than a bandeja but more controlled and spin-focused than a flat smash. Choosing the right ball is just as important as the swing itself.
What Is the Vibora?
“Víbora” is the Spanish word for “viper.” The name reflects the sideways movement created by the shot’s lateral spin, particularly after the ball bounces and interacts with the walls.
The vibora is an overhead rather than a conventional flat smash. The racket moves forward and across the outside or back-side of the ball, producing sidespin that may also include elements of slice or topspin.
This combination creates a fast, dipping trajectory and a low, awkward rebound. Instead of relying entirely on power, the shot uses pace, placement and spin to keep the defenders under pressure.
What Is the Purpose of the Vibora?
The immediate objective is to attack a lob without surrendering the net position. By sending the ball deep with lateral spin, you can keep the defending pair near the back of the court and make their next contact more difficult.
A good vibora may:
- Produce a low rebound around the side or back glass.
- Force the defender to contact below a comfortable height.
- Prevent an accurate counter-lob.
- Create a weak ball for your next volley.
- Draw an error from a player defending in the corner.
- Maintain pressure without attempting a maximum-power smash.
The shot does not need to end the point immediately. If the opponent can only return a slow or rising ball, the vibora has created a strong attacking opportunity.
When to Hit a Vibora
Against a Manageable Lob
The ideal opportunity is a short or central lob that gives you enough time to turn, move behind the ball and make contact in front.
The ball should be reachable without forcing you into a desperate backward movement. If you are balanced and can create space between your body and the ball, you can accelerate across it with control.
While You Are Still in an Attacking Position
The vibora is most effective when you remain relatively close to the net and the incoming ball does not push you deep into the court. From this position, you can use a more aggressive trajectory and recover forward after contact.
If the lob forces you much farther back, the safer choice may be to play a controlled overhead or allow the ball to bounce and use the back glass.
When the Ball Is on Your Racket Side
You need lateral space to swing across the ball. A lob arriving comfortably on the racket side usually presents a better vibora opportunity than one travelling over the opposite shoulder.
The exact selection depends on handedness, court side and positioning. The vibora is not exclusively a shot for one side of the court, but some incoming trajectories are naturally easier to attack than others.
When the Opponents Are Defending Deep
The shot becomes especially effective when the opponents are close to the back glass. They have less time to judge the spin, and the ball may change direction after interacting with the corner.
If the opponents have moved forward, adjust the target rather than automatically aiming for the glass. A low ball toward their feet or body may be more effective.
When Not to Hit a Vibora
Do not force the shot simply because the ball is above your head. The vibora requires enough time, balance and space to accelerate across the ball.
Choose another option when:
- The lob is too deep and carries you toward the back glass.
- You are moving backward at contact.
- The ball has travelled behind your body.
- The ball is too close to your head or hitting shoulder.
- You cannot create enough lateral space for the swing.
- The lob arrives awkwardly over your non-racket shoulder.
- Your partner has not adjusted position to cover the court.
- A simple controlled overhead would preserve the net with less risk.
A deep or difficult ball will often call for a bandeja rather than a vibora. If the ball passes you completely, let it bounce and defend from the back instead of attempting an off-balance overhead.
Vibora vs Bandeja vs Smash
These three overheads respond to different types of incoming balls and tactical situations.
| Shot | Best opportunity | Main objective | Typical trajectory |
|---|---|---|---|
| Vibora | Manageable lob while balanced and relatively close to the net | Apply pressure with pace and lateral spin | Fast, dipping and directed toward a corner or difficult defensive area |
| Bandeja | Deeper or less attackable lob | Preserve the net with control | More moderate pace with a safer, sliced trajectory |
| Flat smash | Very short, high ball contacted well in front | Finish the point or create an unreachable rebound | Direct and powerful with less emphasis on lateral movement |
The differences are not defined by one exact court position or contact height. They depend on the depth of the lob, your movement, the available target and the opponents’ positions.
When uncertain, choose the overhead you can execute while balanced. A controlled shot that maintains pressure is usually more valuable than a poorly selected attacking attempt.
How to Hit a Vibora Step by Step
1. Recognize the Lob Early
Watch the opponent’s racket face and swing path. When you identify a lob, turn immediately rather than waiting to see where the ball will land.
Early recognition gives you time to move behind the ball and choose between a vibora, bandeja, smash or bounce. Making the decision late often leaves the contact point behind your body.
2. Turn Sideways
Rotate your shoulders and hips so your body becomes side-on to the net. This creates space for the racket and allows the torso to contribute to the swing.
Avoid retreating while facing directly forward. Backpedalling in a square position makes balance more difficult and increases the chance of contacting the ball too close to your body.
3. Move Behind the Ball
Use side steps or crossover steps to adjust backward. Your goal is to position yourself behind the expected contact point so you can move slightly forward into the shot.
Take larger initial steps when the lob is travelling deep, then use smaller adjustments as the ball descends. Avoid crossing your feet immediately before contact if it leaves you unstable.
4. Use a Continental Grip
The continental grip is the most practical starting grip for the vibora. It allows you to present a stable racket face while producing the forearm rotation and lateral brushing action required for spin.
Advanced players may make subtle grip adjustments, but they are not essential. Learn to control the continental grip before experimenting with more extreme positions.
5. Prepare With the Racket High
Raise the racket behind and above the hitting shoulder with the elbow bent. The non-dominant arm should point toward or track the ball, helping you judge its path and maintain balance.
Keep your shoulders coiled and avoid dropping the elbow too early. A low preparation makes it harder to accelerate across the upper or outer surface of the ball.
6. Create Space on the Racket Side
The ball should remain far enough from your body for the arm to extend through the swing. If it becomes crowded, you will struggle to brush across it and may compensate with an uncontrolled wrist movement.
Continue adjusting until the ball is in front and to the side. The exact distance changes with your height, arm length and intended variation.
7. Contact in Front and to the Side
A typical vibora contact occurs around head height or slightly above, but there is no universal contact point. A lower version may be struck closer to head height, while a more aggressive variation can be contacted somewhat higher.
The ball should still be in front of your body. Contacting behind the head reduces control, makes forward recovery difficult and often sends the shot too high.
8. Brush Across the Ball
Accelerate forward and across the outside or back-side of the ball. The path should combine a lateral action with a slight downward component, producing a fast trajectory and pronounced sidespin.
Do not contact directly underneath the ball. That creates a more open, floating trajectory similar to a bandeja. Striking straight through the centre produces a flatter overhead with less of the characteristic sideways rebound.
9. Use the Whole Kinetic Chain
Generate racket speed through torso rotation, elbow extension and controlled forearm rotation. These movements should work together in one continuous action.
Avoid treating the vibora as a violent wrist flick. Excessive isolated wrist movement makes the racket face unstable and reduces your ability to control the target.
10. Follow Through Across the Body
Allow the racket to continue forward and across after contact. Stopping the swing abruptly limits spin and can leave the ball short.
Finish in balance with your momentum helping you recover toward the net. Bring the racket back to the ready position before the opponents strike their reply.
Understanding Vibora Spin
The defining spin is lateral, but the exact rotation is not identical on every vibora. Depending on the contact height and swing path, the sidespin may be blended with slice or a small topspin component.
This is why reputable coaches and manufacturers sometimes describe the spin differently. The important feature is that the racket brushes across the ball rather than hitting entirely underneath or directly through its centre.
The resulting rebound also depends on several factors:
- Whether the player is right-handed or left-handed.
- Whether the shot travels crosscourt or down the line.
- How much lateral spin is produced.
- Which part of the wall or fence the ball reaches.
- The speed and angle of the first bounce.
Do not assume the ball will always kick in one direction. Learn how your own vibora behaves from each side of the court.
Low-Contact and High-Contact Viboras
Low-Contact Vibora
The lower variation is generally contacted around head height. It prioritizes a low bounce and controlled trajectory rather than maximum speed.
This version can be effective when you want to keep the opponent trapped in the corner and force the next ball upward. It is often the more repeatable variation for developing players.
High-Contact Vibora
A higher contact can produce greater speed and a more aggressive downward trajectory. It may also bring the side fence into play when the angle is available.
As the contact moves higher and farther in front, the shot begins to share characteristics with a smash. Select the variation according to the ball rather than trying to force every lob into the same contact point.
Where to Aim the Vibora
Deep Crosscourt Corner
The crosscourt corner is the classic target because the diagonal provides more court length and brings both the side and back glass into the point. Lateral spin can make the rebound difficult to predict.
Aim for a legal first bounce inside the opponents’ court. The ball must bounce before it contacts the glass or fence, so do not direct it straight into the enclosure on the fly.
Side-Glass and Back-Glass Area
A ball that bounces before reaching the junction of the side and back glass can create an awkward double-wall sequence. The defender must judge both the incoming spin and the changing rebound angle.
This is an effective target only when you have enough control. Missing the intended bounce point can send the ball directly into the glass or leave an easy rebound.
Near the Side Fence
The irregular rebound from the fence can make the ball difficult to read. A higher-contact vibora may be directed toward this area when the angle and court position support it.
Use a larger target while learning the shot. Attempting to hit a small section of fence from an unstable position creates unnecessary errors.
At the Opponent’s Feet or Body
When the defenders move forward or anticipate the corner, direct the shot toward their feet or playing hip. This reduces their time and can force an uncomfortable block.
The body target also provides more margin than a narrow corner. It can be useful when you need a controlled aggressive option rather than a spectacular angle.
Through the Middle
The middle can limit the opponents’ reply angles and create uncertainty over who should take the ball. It is particularly useful when both defenders have moved toward their respective corners.
However, a central ball that rebounds high from the back glass may give an opponent an attacking bajada. Keep the trajectory low enough to prevent a comfortable wall exit.
How Hard Should You Hit the Vibora?
The vibora should be fast enough to apply pressure but not so hard that you lose the spin, target or recovery position. Maximum power is not required.
A technically sound vibora at moderate speed can be extremely effective if it stays low and forces the opponent to lift the ball. Adding pace without controlling the rebound may simply give the defender a faster ball to use off the glass.
Build speed gradually. First develop the correct positioning, contact and lateral spin, then accelerate while maintaining the same depth and target.
What to Do After Hitting the Vibora
Recover toward your net position as soon as the racket completes the follow-through. Do not remain in the middle of the court watching the ball.
Stop and split-step before the opponent makes contact. Be prepared for a blocked return, defensive lob or ball toward your feet. Reliable volley technique will help you handle the weaker reply that the vibora is designed to create.
Your partner must adjust while you move backward for the overhead. They may need to shift toward the middle temporarily, then return to the correct formation as you recover. Clear communication and coordinated movement are central to working effectively with your partner.
Common Vibora Mistakes
Choosing the Wrong Lob
A deep lob that pushes you behind the ideal contact zone is not a good vibora opportunity. Choose a safer overhead or allow the ball to bounce.
Moving Backward While Facing the Net
Backpedalling square to the net reduces balance and prevents effective torso rotation. Turn sideways as soon as you recognize the lob.
Contacting Behind the Body
Late contact makes the shot difficult to direct and prevents you from recovering forward. Move behind the ball early enough to contact in front.
Standing Too Close to the Ball
Insufficient lateral space restricts the arm and turns the swing into a cramped wrist action. Continue adjusting until you can extend comfortably across the ball.
Dropping the Elbow
A low elbow changes the swing path and makes strong lateral contact difficult. Keep the preparation high with the elbow bent before beginning the forward movement.
Hitting Underneath the Ball
Moving directly beneath the ball produces height and slice but not the aggressive sideways trajectory of a vibora. Brush across the outer surface instead.
Hitting Completely Flat
A flat centre contact may produce speed but removes the spin that makes the rebound difficult. Reduce the pace and focus on the correct contact path.
Using Only the Wrist
The wrist and forearm contribute to the spin, but they should not operate independently. Combine body rotation, arm extension and forearm movement.
Trying to Hit Every Vibora at Maximum Speed
Excessive pace increases errors and can create a comfortable rebound from the glass. Prioritize placement, spin and low bounce.
Failing to Recover the Net
A strong shot can still leave your team vulnerable if you remain out of position. Recover promptly and prepare for the next contact.
Drills to Improve the Vibora
Shadow-Swing Drill
Practise the complete movement without a ball. Start in the ready position, turn sideways, raise the racket and non-dominant arm, simulate moving behind the lob and finish across the body.
Include the recovery and split step in every repetition. The drill should train the complete sequence rather than only the arm movement.
Easy-Lob Feeding Drill
Have a partner feed comfortable lobs toward your racket side. Hit at moderate speed toward a large crosscourt target.
Focus on getting behind the ball, contacting in front and producing lateral spin. Do not add power until the movement becomes repeatable.
Corner-Target Drill
Place a large target in the deep crosscourt corner. Score the attempt only when the ball bounces inside the target area before reaching the glass or fence.
Gradually reduce the target size as your control improves. Maintain the same balanced recovery after every shot.
Low-Rebound Drill
Ask a defender to judge the rebound after each vibora. The objective is not to hit a winner but to keep the ball below a comfortable attacking height after the glass.
Experiment with different speeds and contact heights. Identify which combination produces the lowest controllable rebound.
Overhead Decision Drill
Have the feeder vary the depth and height of each lob. Call the correct response before striking:
- Vibora for a manageable attacking lob.
- Bandeja for a deeper or less comfortable lob.
- Smash for a very short ball that can be contacted high and in front.
- Bounce for a lob that passes beyond a safe overhead position.
This drill develops shot selection as well as technique.
Vibora-Plus-One Drill
Play the vibora, recover to the net and continue the rally. The feeder blocks the first ball back so you must execute the next volley.
This trains the vibora as a point-building shot rather than assuming it will always produce an immediate winner.
Frequently Asked Questions
Is the Vibora a Smash?
It is an attacking overhead and is sometimes described as a type of smash. However, it relies more heavily on lateral spin, corner placement and a low rebound than a conventional flat power smash.
Does the Vibora Use Slice or Topspin?
The defining component is sidespin. Depending on the swing path and contact, it can be blended with slice or a small topspin component.
Is the Vibora More Aggressive Than the Bandeja?
Generally, yes. The vibora normally uses greater pace and more pronounced lateral spin, while the bandeja prioritizes control and maintaining the net from a less favorable position.
Should a Vibora Always Be Hit Crosscourt?
No. Crosscourt provides more space and useful wall angles, but the middle, body and down-the-line areas can all be effective when the opponents’ positions make them available.
Can Both Right-Side and Left-Side Players Hit a Vibora?
Yes. The most natural opportunities depend on handedness, court side and the direction of the lob. No single court role owns the shot.
Is the Vibora Suitable for Beginners?
Beginners can learn the preparation and movement pattern, but they should first develop reliable overhead positioning and control. A consistent bandeja is a useful foundation before adding the faster lateral swing of the vibora.
Does a Vibora Need Maximum Power?
No. Depth, spin, placement and a low rebound matter more than raw speed. A slower vibora that forces the defender to hit upward can be more effective than an uncontrolled hard shot.