
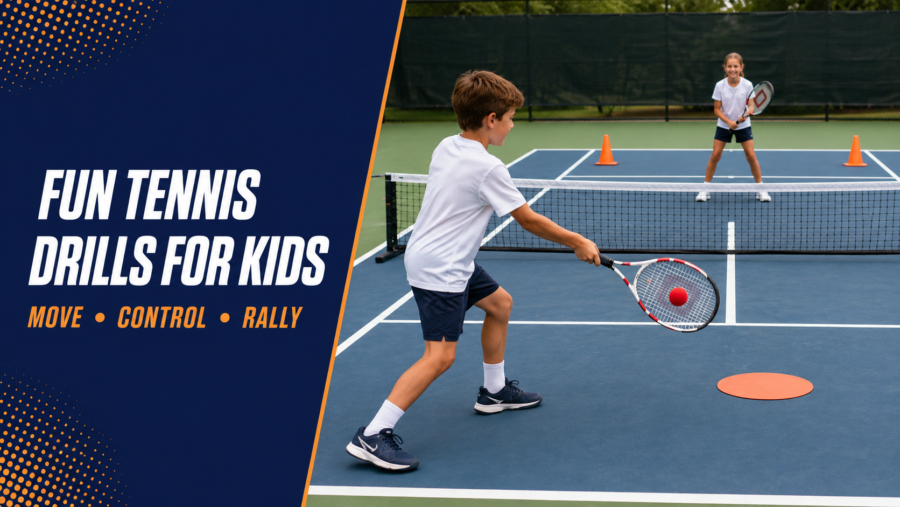
The best tennis drills for kids look like games but teach a clear skill. Start with rolling, bouncing, catching and short-racket activities, then progress toward rallying, serving and simple point play as the child gains control.
Use a court, ball and racket that fit the player rather than rushing toward adult equipment. A smaller space and a slower ball create more successful contacts, which gives the child more chances to move, make decisions and enjoy the session.
Match the Drill to the Child
Age can be a useful starting point, but coordination, confidence and experience should control the final choice. The USTA youth pathway uses red balls on a 36-foot court, orange balls on a 60-foot court, and green balls on a full-size 78-foot court before standard yellow-ball play.
Those stages are not a race. A player can repeat an easier version until the movement and contact are reliable, then change one variable at a time.
| Stage | Useful setup | Main drill goal |
|---|---|---|
| First contact | Balloon, foam ball or red ball in a small safe area | Tracking, balance and controlled contact |
| Red ball | 36-foot court or marked mini-court | Rallying, basic direction and simple scoring |
| Orange ball | 60-foot court | Longer movement, serve-return starts and point patterns |
| Green ball | Full court with lower-bouncing ball | Transition to full-court positioning and tactics |
| Yellow ball | Full court | Standard-ball timing, patterns and match play |
Junior Tennis Racket Size Guide covers equipment fit in detail. This page owns the activities, so the drills below use adaptable setups rather than repeating age-and-height racket charts.
What You Need
Most sessions can be built from:
- An appropriate racket for each child
- Foam, red, orange, green or yellow balls
- Cones, floor spots or chalk markers
- A mini-net, regulation net or safe improvised divider
- Buckets or large targets
- Water and suitable court shoes
Clear spare balls away from the playing path. A basket beside the feeder is safer than leaving balls scattered behind the hitter.
Families assembling a first kit can use Beginner Equipment Checklist for Tennis to distinguish useful basics from optional accessories.
1. Balloon Rally
Skill
Tracking, gentle racket control and cooperation.
Setup and Rules
Stand two players a few steps apart with a balloon and one racket each. Tap the balloon upward or across an imaginary net and count consecutive contacts without letting it touch the ground.
Begin with any part of the racket, then require alternate forehand and backhand faces. A child who is not ready for a racket can use an open hand first.
Progression
Add a rope or low barrier, restrict each player to one contact, or use a large foam ball after ten controlled balloon hits. Keep enough space between children so rackets cannot collide.
2. Bounce, Tap and Catch
Skill
Hand-eye coordination and control of racket-face angle.
Setup and Rules
The player drops a ball, lets it bounce, taps it gently upward with the strings and catches it after the next bounce. Count controlled repetitions rather than speed.
Progress from one tap to several upward taps without catching. The USTA uses self-rally activities as an early route toward controlling ball height on both forehand and backhand sides.
Progression
Alternate the two racket faces, move between two cones while tapping, or set a maximum height. If the ball repeatedly escapes, return to a foam or red ball and a stationary position.
3. Racket Sandwich Relay
Skill
Balance, teamwork and spatial awareness.
Setup and Rules
Two children hold a ball between their racket faces and walk together around a cone without dropping it. They must communicate and change direction slowly.
For one player, balance the ball on the strings and walk a short course. This is a coordination activity, not a race until everyone can move safely.
Progression
Add a gentle turn, a stop-and-start signal or a second pair working alongside. Do not add running while the ball is held between two rackets.
4. Cone Gate Rally
Skill
Direction, cooperative rallying and recovery.
Setup and Rules
Place two cones several feet apart to create a wide target gate. Partners roll or hit the ball through the gate and recover to a marked home spot after each contact.
Beginners can roll the ball with the racket along the ground. More experienced players use a bounce and send the ball over a low net into a larger gate.
Progression
Narrow the gate only after the pair can sustain a rally. Add one point for the target and one point for recovering to the home spot, which rewards movement rather than accuracy alone.
5. Traffic Lights
Skill
Starting, stopping, balance and listening.
Setup and Rules
Players move in a clear area while the leader calls green, yellow or red. Green means controlled forward movement, yellow means small adjustment steps, and red means stop in a balanced ready position.
Add a split step on red or a shadow forehand after the stop. Keep children moving in the same direction or in separate lanes to avoid collisions.
Progression
Call a side as well as a color, such as “red, backhand,” then ask the child to turn and shadow the named shot. The goal is a balanced response, not maximum speed.
6. Throw, Bounce and Hit
Skill
Spacing and a controlled contact point.
Setup and Rules
The feeder stands to the side and gently tosses a ball so it bounces in front of the hitter. The child turns, lets the ball enter a comfortable contact zone and sends it toward a large target.
Use predictable feeds before alternating sides. The feeder should stay outside the swing path and wait until the hitter has recovered before releasing the next ball.
Progression
Move from hand feeds to a short partner rally. Add a home marker so the hitter learns to recover instead of watching the shot.
7. Target Islands
Skill
Height, direction and purposeful placement.
Setup and Rules
Create large target islands with hoops, cones or chalk. Players receive a point when a bounced ball lands inside an island and a second point when they return to the ready position.
Large targets keep the game achievable. Place them well inside the court so success does not depend on hitting close to a line.
Progression
Assign different values to deep, cross-court and central targets. Older or more experienced players can choose a target before the feed and explain why it is a safe option.
8. Cooperative Rally Ladder
Skill
Consistency and appropriate pace.
Setup and Rules
Partners try to complete two consecutive shots, then four, six and ten. If the rally ends, they restart at the previous completed level rather than returning to zero.
The objective is to help the partner, not defeat them. Players should use enough net clearance and moderate pace to give the other child a playable ball.
Progression
Require alternating forehands and backhands, one cross-court direction or a recovery touch on a cone after every shot. Move the players farther apart only when the current distance produces regular rallies.
9. Serve Into the Castle
Skill
Starting a point with direction and a repeatable routine.
Setup and Rules
Build a large castle target from cones inside the correct service box. A new player can begin with a drop-hit from the service line, while a child ready for the full motion serves from a suitable distance.
Reward a legal start and balanced finish as well as hitting the target. Do not encourage a child to swing harder simply because the ball falls short.
Progression
Move the starting line back gradually, reduce the target size or add a receiver who catches the serve after one bounce. Technique instruction should stay simple and appropriate to the child’s stage.
10. Serve, Return and Freeze
Skill
Recognizing the first two shots and recovering after contact.
Setup and Rules
One player starts with a drop-hit or serve, the receiver returns, and both players freeze. Check whether each has recovered toward a sensible position before restarting.
This slows down the pattern and makes movement visible. It is more useful than playing rapid points when both children forget positioning after the first shot.
Progression
Add a third ball, then play the point out. Rotate server and receiver frequently so one child is not serving for the entire activity.
11. Around-the-Court Team Challenge
Skill
Rallying, teamwork and low-pressure competition.
Setup and Rules
Divide players into two small teams. Each player hits one controlled ball, moves safely to the back of the line and earns a team point when the group completes a chosen rally target.
Avoid elimination. A child who misses should rejoin immediately, keeping everyone active and preventing the strongest players from receiving all the repetitions.
Progression
Set a cooperative team record, alternate forehand and backhand feeds, or require every player to touch the ball before a point can be earned.
12. Mini-Tennis Points With Bonus Goals
Skill
Decision-making, scoring and sportsmanship.
Setup and Rules
Play short points on a reduced court with an appropriate ball. Use a simple first-to-seven format and award one bonus point for a stated process goal, such as recovering after every shot or completing three rally balls before attacking.
The bonus should reinforce the session theme without making the scoring confusing. Change it between games rather than applying several rules at once.
Progression
Introduce serving order, a second serve or standard scoring when the children are ready. USTA Team Challenge uses level-based, low-pressure play and emphasizes participation over results, which is a useful model for an informal session.
Sample Sessions by Experience
First Tennis Session: About 25 Minutes
- Traffic Lights, 4 minutes
- Balloon Rally, 5 minutes
- Bounce, Tap and Catch, 5 minutes
- Throw, Bounce and Hit, 7 minutes
- Cooperative finish, 4 minutes
Improving Red or Orange Ball Player: About 40 Minutes
- Movement warm-up, 6 minutes
- Cone Gate Rally, 8 minutes
- Target Islands, 8 minutes
- Serve Into the Castle, 8 minutes
- Mini-tennis points, 10 minutes
Green or Yellow Ball Player: About 55 Minutes
- Dynamic movement and mini-tennis, 10 minutes
- Cooperative Rally Ladder, 10 minutes
- Serve, Return and Freeze, 10 minutes
- Target pattern, 10 minutes
- Short-set or tie-break play, 15 minutes
These are templates, not mandatory workloads. Shorten the session when attention, technique or safe movement begins to decline.
How to Keep Tennis Drills Fun
Give each activity one clear goal and explain it in a sentence. Demonstrate quickly, start the game and make changes while the children are active rather than delivering a long technical speech.
Use personal records and team totals more often than elimination. Offer two difficulty levels so a child can choose a challenge without being labelled as the weakest player.
Ask a simple reflection question at the end: “What helped the rally last longer?” or “Where was the safest target?” This connects the game to tennis without turning it into a lecture.
Parents looking for the broader development pathway can read Junior Tennis 101: A Guide for Parents and Young Players.
Common Mistakes When Coaching Kids
Using an Adult Court and Ball Too Soon
A standard ball can bounce above a small player’s comfortable strike zone and make the court feel enormous. Use a slower ball and reduced space until the child can rally and recover with control.
Feeding Too Quickly
The next ball should not arrive while the child is off balance or still inside the previous swing. Fewer well-spaced feeds create better movement and reduce loose balls on court.
Giving Too Many Instructions
Choose one cue for the drill. Constant corrections can remove the decision-making and enjoyment that the activity is meant to create.
Letting One Child Dominate
Rotate roles and avoid long lines. Use stations, partner tasks or small teams so every child receives frequent contacts.
Making Every Drill Competitive
Competition can be motivating, but cooperative targets teach control and help mixed-level groups. Alternate team challenges with shared rally goals.
Safety and Supervision
Use a flat, dry, well-lit area with enough clearance between players. Close access gates where appropriate, keep baskets outside movement lanes and stop play while loose balls are collected.
Children should wear suitable court shoes, have water available and use equipment they can control. Weather, heat and individual needs can require a shorter or modified session.
An adult should supervise informal practice, and organized instruction should follow the facility’s safeguarding requirements. Parents comparing lesson formats can use Are Private Tennis Lessons Worth It? without treating a private lesson as automatically necessary for every child.
Final Advice
Choose an appropriate ball, reduce the space and make the first goal achievable. Build from tracking and control to rallying, serving and point play, changing only one challenge at a time.
The strongest kids’ session is not the one with the most drills. It is the one that gives every child frequent safe contacts, a clear success and a reason to want another hit.
Frequently Asked Questions
What is the easiest tennis drill for a young beginner?
Balloon Rally or Bounce, Tap and Catch is a good starting point because it slows the object and removes the pressure of a full court. Progress to a foam or red ball when control improves.
How long should a kids’ tennis practice last?
There is no universal duration. Age, attention, temperature and experience matter, and a short active session is better than continuing after safe movement and concentration have fallen.
Should children use normal yellow tennis balls?
Not automatically. Red, orange and green balls are designed to create developmentally appropriate speeds and bounces. A coach can judge readiness using skill as well as age.
Are games better than technical drills for children?
They can serve the same purpose. A well-designed game gives repeated practice of one movement or decision while keeping the child engaged.
How can two children of different levels practise together?
Give them a cooperative target, allow the newer player an extra bounce, enlarge one target or use a slower ball. Adjust the task instead of expecting both children to produce the same shot.