
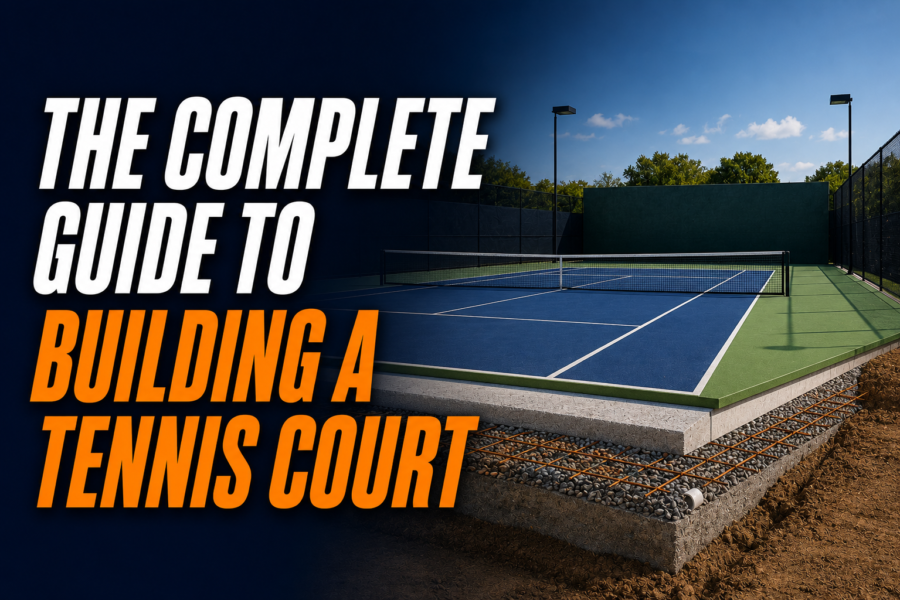
Building a tennis court is a site-engineering project, not simply a paving and painting job. A reliable court needs enough land for the playing lines and runoff, a stable subgrade, a base designed for the local soil and climate, controlled drainage, the chosen surface system, safe access and any required fencing, lighting and permits.
The correct design changes with the site. An acrylic hard court, clay court, natural-grass court and sand-filled artificial surface do not use one universal base or drainage detail. Start with a specialist court designer or builder, a topographic survey and appropriate geotechnical advice before selecting a construction system or accepting a fixed price.
New Construction, Reconstruction or Resurfacing?
First identify the project. These scopes are not interchangeable.
| Project Type | What It Normally Addresses | What It Does Not Automatically Fix |
|---|---|---|
| New construction | Site preparation, subgrade, drainage, foundation, base, playing surface and court infrastructure | Existing site constraints still require investigation and engineering |
| Reconstruction | Failed base, major settlement, drainage defects or a court that needs substantial removal and rebuilding | The exact scope depends on investigation beneath the visible surface |
| Resurfacing | Cleaning, localized repairs and a renewed playing layer on a base that remains suitable | Unstable soil, structural movement, widespread base failure or badly designed drainage |
Applying a new acrylic coating to a moving or water-damaged base may improve appearance temporarily without correcting the cause. If an existing court is involved, establish whether it needs resurfacing, structural rehabilitation or reconstruction before requesting comparable quotes.
This guide owns the new-build process. Resurfacing timing, crack-repair systems and condition-based resurfacing costs belong in a dedicated restoration plan.
Tennis Court Planning Checklist
Before design begins, define:
- Intended use: private recreation, coaching, club, school or sanctioned competition
- Singles only or combined singles and doubles lines
- Expected daily and annual use
- Required governing-body or league standards
- Available land, setbacks and construction access
- Soil, slope, groundwater and stormwater conditions
- Local climate, freeze-thaw exposure and irrigation needs
- Preferred playing surface and realistic maintenance capacity
- Fencing, gates, seating, storage and spectator needs
- Evening-use requirements and lighting restrictions
- Accessibility obligations
- Planning, building, electrical, drainage and environmental approvals
- Capital budget, contingency and long-term maintenance budget
A written brief prevents a contractor from pricing a basic private court when the owner expects a competition venue with lighting, accessible circulation and spectator space.
Official Tennis Court Dimensions
The official playing lines do not include the surrounding space needed to run behind the baseline or outside the sideline.
| Feature | Official Measurement |
|---|---|
| Court length | 78ft / 23.77m |
| Singles width | 27ft / 8.23m |
| Doubles width | 36ft / 10.97m |
| Service-line distance from net | 21ft / 6.40m |
| Net height at posts | 3ft 6in / 1.07m |
| Net height at center | 3ft / 0.914m |
The International Tennis Federation gives separate guidance for clear space to backstops and sidestops:
| Use Level | Space Behind Each Baseline | Space Beyond Each Sideline | Approximate Total Clear Rectangle for One Combined Court |
|---|---|---|---|
| Recreational and club guidance | 18ft / 5.48m | 10ft / 3.05m | 114 x 56ft / 34.75 x 17.07m |
| International-competition guidance | 21ft / 6.40m | 12ft / 3.66m | 120 x 60ft / 36.57 x 18.29m |
Those are playing-clearance guides, not a complete property requirement. Extra land may be needed outside the enclosure for drainage, foundations, lighting columns, access routes, maintenance, landscaping, retaining structures and setbacks.
Local governing bodies or event categories may require a larger layout. Confirm the applicable standard before fixing fence lines. Tennis Court Dimensions and Size Guide explains the line layout and clearance measurements in greater detail.
Step 1: Confirm Whether the Site Is Feasible
A flat-looking lawn is not proof of a buildable court platform. Site investigation should assess both visible conditions and what lies below the surface.
Survey and Boundaries
A topographic and boundary survey should show levels, property lines, easements, structures, access, utilities and the direction of overland water flow. This allows the designer to calculate cut and fill, retaining needs and the real footprint.
Do not position a court from an online property map alone. Small boundary or elevation errors become expensive once earthworks, posts and drainage are installed.
Soil and Subgrade
Geotechnical advice is especially important where the site contains fill, expansive soil, weak material, high groundwater, buried waste, steep slopes or freeze-thaw exposure. The report informs excavation depth, compaction, foundation design and drainage.
Different soils move differently as moisture changes. A base copied from another property can fail even when the surface system is identical.
Water
Map water from higher land, roofs, paving, nearby watercourses and below-ground seepage. The design must keep external runoff from crossing the court and must discharge collected water legally without creating a problem on another property.
Surface water and subsurface moisture are separate issues. A visible channel may solve runoff while leaving groundwater movement beneath the platform untreated.
Construction Access
Excavators, compactors, asphalt equipment, concrete trucks and material deliveries need suitable access. A narrow side yard, overhead line, weak driveway or restricted working hours can change the method and price even when the finished court fits.
Vegetation
Trees can create shade, debris, root movement and future maintenance. Removing vegetation may also trigger environmental controls or expose the site to erosion, so the solution is not automatically to clear everything near the court.
Step 2: Choose the Court Orientation
An approximate north-south playing axis is a common starting recommendation because it can reduce the amount of low morning or evening sun directly behind a baseline. It is guidance, not an official court-line rule.
The best orientation depends on latitude, local sun path, the hours when the court will be used, surrounding buildings, trees, terrain, prevailing wind and available land. In some locations, shifting several degrees from true north gives a better result.
A designer should compare sun exposure at expected playing times rather than rotating a plan to north automatically. Orientation also cannot compensate for poor runoff space or an unsuitable subgrade.
Step 3: Check Permits, Setbacks and Neighbor Impacts
Approval requirements vary by country, state, municipality and property type. Before ordering work, ask the relevant authority about:
- Planning or zoning approval
- Building or grading permits
- Fence and retaining-wall limits
- Drainage and stormwater discharge
- Electrical permits for lighting
- Tree removal or environmental controls
- Impervious-surface or lot-coverage limits
- Noise, operating hours and light spill
- Homeowners’ association or title restrictions
- Setbacks from boundaries, septic systems, utilities and structures
A permit for the playing slab may not cover lighting, tall fencing or a retaining wall. Obtain written confirmation for the complete scope.
Accessibility
Public, commercial, school and club facilities can have accessibility duties beyond the playing dimensions. In the United States, covered court-sport facilities require an accessible route to each court and a direct accessible connection between both sides of a court. Gates, route width, slopes, controls, parking, seating and amenities can add further obligations.
Other jurisdictions use different codes, and private residential projects may be treated differently. Accessibility should be designed at the beginning, not added after fence posts, levels and gates are fixed.
Step 4: Select a Surface for the Site and Operating Plan
Surface choice affects base construction, drainage, pace, bounce, maintenance, weather recovery and long-term cost. How Do Tennis Court Surfaces Differ? provides the deeper playing comparison; the table below focuses on construction decisions.
| Surface Family | Typical Construction Direction | Operating Considerations | Important Limitation |
|---|---|---|---|
| Acrylic hard court | Acrylic coatings over a designed asphalt or concrete base, with an optional cushion system | Relatively predictable routine care and widely available contractors in many regions | Base movement and drainage defects can show as cracking or low spots |
| Natural clay or granular court | Layered mineral construction with drainage and often irrigation designed for the local clay system | Regular watering, brushing, line care and material management | Climate, water availability and maintenance labor strongly affect suitability |
| Natural grass | Engineered drainage, root-zone construction, selected turf and specialist agronomy | Frequent mowing, irrigation, renovation and restricted use during unsuitable conditions | Not a low-maintenance substitute for a lawn |
| Sand-filled artificial grass or artificial clay | Manufactured carpet and infill over a compatible, usually porous base | Debris removal, brushing and infill management | Product systems and local acceptance vary; drainage still depends on the whole build |
| Indoor carpet or polymeric system | Product-specific layer over a very flat compatible substrate within an enclosure | Enclosure, climate control and indoor maintenance become part of the project | Indoor-building design and operating cost are separate major scopes |
There is no universally “best” surface. A clay court can be a strong choice where expertise, water and daily care are available but a poor choice where maintenance cannot be sustained. A hard court can reduce daily surface work but still needs drainage, crack monitoring and periodic renewal.
When comparing products, ask for:
- Exact system name and layer build-up
- Required base and tolerances
- Drainage method
- Court-pace or governing-body classification where relevant
- Installation conditions and curing requirements
- Maintenance plan
- Written warranty, exclusions and remedy process
- References for courts built in a similar climate and soil environment
Step 5: Design Drainage Before the Base
Drainage must be designed with the court, not added after puddles appear. The system may include grading, perimeter swales, channels, catch basins, subsurface interception, a permeable base or a combination.
The court surface usually needs a controlled fall, but there is no universal slope for every system. For example, ITF construction guidance describes a 0.25–0.35% slope for a particular above-ground-irrigated clay construction. Other bases and surfaces require different gradients and drainage paths.
The designer should specify:
- Direction and percentage of surface fall
- Finished-level tolerances
- How water reaches drains without crossing unsafe edges
- How external runoff is diverted
- Whether groundwater interception is needed
- Drain capacity for local rainfall
- Legal discharge location
- Access for inspection and cleaning
Too little fall can leave low spots. Too much or multi-directional fall can affect play and construction accuracy. A number copied from a generic diagram is not a drainage design.
Step 6: Build the Platform, Foundation and Base
The ITF describes most court systems as a sequence of formation, foundation, regulating base and wearing surface. The exact materials and depths depend on the selected system, soil and climate.
Prepare the Subgrade
Construction typically removes topsoil and unstable organic matter before shaping and compacting the formation. Unsuitable areas are excavated and replaced according to the engineer’s specification.
If cut-and-fill work creates the platform, fill must be placed and compacted in controlled layers. Retaining structures and erosion protection may be required on sloping sites.
Install Drainage and Below-Surface Services
Drainage, electrical conduits, sleeves and other work that must pass beneath or around the court should be installed before the base closes access. Penetrating a completed base later can create weak points.
Place the Foundation
The aggregate foundation supports the upper layers and contributes to drainage and frost resistance. Aggregate type, grading, compacted depth and moisture condition must match the design.
A geotextile may be specified to separate layers, distribute load or limit root intrusion. It is not automatically required in the same form on every site.
Construct the Base
An acrylic court commonly uses asphalt or concrete beneath the coating. ITF guidance notes that concrete should be reinforced to reduce cracking, while asphalt construction requires controlled aggregate, temperature, placement and compaction.
Artificial and granular systems use different base arrangements. The installer should provide a layer-by-layer specification rather than the generic phrase “sports base.”
Verify Levels and Compaction
Surveyed levels, compaction records, smoothness and drainage performance should be checked before the playing layer is accepted. A coating cannot correct a base that is outside tolerance.
Step 7: Install the Playing Surface
The installation sequence depends on the system:
- Acrylic systems require a suitable cured base, preparation and the specified coating layers.
- Cushion systems add resilient layers beneath the color coats and must remain compatible with the base and finish.
- Clay systems require the specified mineral layers, moisture management and final dressing.
- Artificial systems require the correct roll layout, seams, anchoring and infill.
- Grass courts require root-zone establishment, turf development and agronomic preparation before play.
Weather and material temperatures can control when work is possible. Do not force coating, paving or turf work outside the product’s stated installation conditions to meet an arbitrary opening date.
After the surface is ready, measure and mark the court to the outside of the lines. Lines must contrast clearly with the surface, and their widths must comply with the applicable rules.
Step 8: Install the Net System
For doubles, the centers of the net posts are positioned 3ft / 0.914m outside each doubles sideline. A combined doubles net used for singles requires singles sticks centered 3ft / 0.914m outside the singles sidelines.
The net is 3ft 6in / 1.07m high at the posts and 3ft / 0.914m at the center, held by a center strap. Post foundations and the center anchor must suit the base design and should be coordinated before surfacing.
Confirm that sleeves, caps, winding equipment and anchors do not create a trip or maintenance problem.
Step 9: Design Fencing and Gates
Fencing contains balls, controls access and provides a structure for optional screening. Height and layout are not one-size-fits-all; they depend on court use, nearby property, local codes, spectator areas and ball-stop needs.
Specify:
- Fence height by location, not just one blanket height
- Mesh type and opening
- Post, rail and foundation design
- Corrosion protection for the environment
- Gate width, threshold, latch and opening direction
- Accessible routes to both sides where required
- Dividers between adjacent courts
- Maintenance access
- Safe distance from the playing-clearance zone
Windscreens add load to fences. They should not be attached to a structure that was not designed for the wind pressure, mesh and attachment pattern involved.
Step 10: Plan Lighting Professionally
Court lighting needs more than a target brightness. A photometric design should consider uniformity, glare, pole positions, mounting height, shadows, color quality, controls and spill beyond the property.
The required performance varies between private recreation, club training, competition and broadcast use. Local authorities may also limit pole height, operating hours or light at a boundary.
Install conduits and foundations at the right construction stage, even if luminaires will be added later. Retrofitting trenches through a completed court can be disruptive and expensive.
Step 11: Add Access, Amenities and Safety Features
Depending on use, the project may need:
- Benches and player seating
- Drinking water
- Equipment storage
- Shade
- Spectator space
- Scoreboards
- Waste bins
- Emergency access
- First-aid provision
- Signage and court numbers
- Walkways and accessible parking
- Secure electrical controls
Keep fixed objects outside the required playing clearances. Place seating, storage and gate swings where they do not interfere with movement behind the baseline or beside the court.
How Much Does It Cost to Build a Tennis Court?
There is no reliable worldwide average. Labor, materials, soil, access, drainage, surface, permitting and currency vary too much.
For context only, published United States consumer cost guides checked in August 2026 place many full-size outdoor installations in a broad range of roughly $30,000–$100,000. Difficult earthworks, retaining walls, premium bases, specialist surfaces, major drainage, lighting, inaccessible sites or commercial requirements can push a project above that range. Land purchase and an indoor enclosure are not included in this planning figure.
Different guides also define “build” differently. A low figure may omit runoff area, fencing, drainage, design, permits or lighting, while another figure may assume a complete 120 x 60ft enclosure. Compare scope, not headlines.
Cost Components to Request Separately
| Cost Group | Items That May Be Included |
|---|---|
| Preconstruction | Survey, geotechnical report, design, engineering, applications and fees |
| Site work | Clearing, excavation, cut and fill, disposal, access and retaining structures |
| Water management | Surface grading, perimeter and subsurface drainage, connection and discharge work |
| Court structure | Subgrade treatment, foundation, base and playing-surface system |
| Equipment | Net posts, net, center strap, anchors and sleeves |
| Enclosure | Fencing, gates, dividers and optional screening |
| Electrical | Design, service upgrade, trenches, poles, controls and luminaires |
| Access and amenities | Paths, accessibility work, seating, storage, shade and landscaping |
| Project allowances | Testing, inspection, contingency, tax and inflation allowance |
Ask every bidder to price the same written specification and to identify exclusions. A lower quote that excludes soil correction or stormwater work is not necessarily a lower total project cost.
New-Build Cost Is Not Resurfacing Cost
Resurfacing an existing structurally serviceable acrylic court can cost much less than constructing a new one because it does not recreate the earthworks, foundation and full infrastructure. Once structural repair, drainage correction or base replacement enters the scope, the job is no longer a simple recoat.
Obtain a condition assessment before comparing a resurfacing price with a new-court range.
How Long Does Construction Take?
Plan in phases rather than relying on a universal “four-to-eight-week” promise. Feasibility, design and permits can take weeks or months before site work begins. Procurement, contractor availability and utility coordination can add more time.
On-site construction itself may take several weeks for a straightforward accessible site, but this is not a guarantee. Weather, earthworks, retaining structures, curing, asphalt availability, coating conditions, turf establishment and inspection can extend the schedule.
A useful program separates:
- Survey and investigation
- Concept and budget
- Detailed design and approvals
- Tender and contractor appointment
- Site preparation and drainage
- Foundation and base
- Curing or settlement period required by the system
- Playing-surface installation
- Fencing, lighting and amenities
- Testing, correction and handover
Do not open the court until the builder and surface manufacturer confirm that the relevant layers have cured or established sufficiently.
Quality Checks Before Handover
The contract should define who tests and accepts the work. At minimum, verify:
- Court dimensions and line placement
- Net-post and center-anchor positions
- Net height and adjustment
- Surface levels, smoothness and drainage
- Consistent finish and color
- Correct layer system and product records
- Fence, gate and hardware operation
- Lighting performance against the design, if installed
- Accessible-route and gate compliance where required
- Drain outlets and cleanouts
- As-built drawings and warranties
- Maintenance and operating instructions
- Correction of punch-list defects
Photograph concealed drainage, conduits and layer construction before they are covered. As-built information is valuable when future work is required.
Maintenance Planning Starts Before Construction
Every surface needs care, but the tasks and frequency differ. The owner should receive a product-specific plan, recommended equipment, inspection schedule and warranty conditions at handover.
At a high level:
- Hard courts need debris control, drainage inspection, cleaning appropriate to the coating and early assessment of cracks or low spots.
- Clay courts need moisture and surface management, brushing, line care and seasonal work. See How to Maintain a Clay Tennis Court for the dedicated process.
- Artificial systems need product-specific brushing, infill and seam care.
- Natural grass requires specialist mowing, irrigation, nutrition, renovation and usage control.
Routine hard-court cleaning and resurfacing are separate topics. This construction guide should not be used as a maintenance schedule.
Ball selection also changes with surface pace and conditions. Best Tennis Balls for Every Court Surface provides the equipment handoff after the court itself is complete.
Common Tennis Court Construction Mistakes
Choosing a Surface Before Investigating the Site
The preferred finish may demand a base, irrigation or maintenance program that the site cannot support economically.
Treating Drainage as a Perimeter Accessory
Water movement through and around the platform must be designed before earthworks and base construction.
Building Only the 78 x 36ft Line Rectangle
Players need clear space beyond the lines. The enclosure also needs room for structures, access and drainage.
Copying a Base Detail From Another Climate
Freeze depth, soil reactivity, rainfall, materials and local practice alter the specification.
Assuming North-South Orientation Overrides Everything
Sun orientation matters, but a rigid alignment can produce poor site fit, excessive excavation or worse wind exposure. Model actual conditions.
Selecting the Lowest Quote Without Aligning Scope
Quotes can differ because one includes drainage, fencing and surface layers while another does not. Use the same drawings and specification.
Adding Windscreens to an Unchecked Fence
Screening changes wind load. The fence and attachments must be designed for it.
Leaving Accessibility Until the End
Gate width, thresholds, levels and routes are difficult to correct after the enclosure and paving are complete.
Expecting a Coating to Repair Structural Failure
Surface coatings do not stabilize moving soil or a failed base.
Should You Build a Tennis Court Yourself?
An owner can manage decisions, compare tenders and perform suitable non-structural finishing work, but a full court normally requires surveying, earthworks, drainage design, compaction control, paving or concrete work and specialist surfacing equipment.
Errors often remain hidden until the base cracks, water ponds or the surface moves. Tennis Queensland’s technical guidance explicitly frames court manuals as decision aids rather than substitutes for qualified designers, engineers and builders.
A safer division is to have professionals design and construct the platform, drainage, base, surface, fencing foundations and electrical work. The owner can then handle approved accessories, landscaping outside the clear zone and routine maintenance within warranty requirements.
Final Takeaway
A successful tennis court begins with feasibility, not a surface color. Confirm the full footprint, investigate soil and water, select a surface the site and owner can support, and design the drainage, base, access and approvals as one system.
Use official playing dimensions, but follow the facility standard required for the intended level. Obtain itemized, like-for-like quotes and keep new construction separate from resurfacing. The lowest-risk project is one designed for its actual site, climate and operating plan rather than assembled from generic dimensions and a universal base detail.
Frequently Asked Questions
How much land is needed for one tennis court?
The official doubles lines occupy 78 x 36ft, but the ITF recreational and club clearance guide produces an approximate 114 x 56ft clear rectangle. International guidance produces about 120 x 60ft. Additional land is needed for construction, drainage, access, structures and setbacks.
Can a tennis court be built on a slope?
Sometimes, but creating a stable, level platform may require significant cut and fill, retaining structures, drainage and engineering. A sloped site can cost substantially more and may not be economical.
What is the cheapest tennis court surface?
There is no universal cheapest option. Local materials, base requirements, drainage, maintenance labor and climate change both installation and life-cycle cost. Compare complete installed systems and long-term care, not the finish alone.
Is asphalt or concrete better under an acrylic court?
Both can be used when properly designed. Asphalt and concrete have different construction, cracking, curing and cost considerations. The correct base depends on soil, climate, contractor expertise and the specified surface system.
Can a backyard tennis court use official dimensions?
Yes, if the property has enough room for the official lines, safe runoff, fencing, access, drainage and required setbacks. Planning or association rules may still restrict the project.
Can the court also have pickleball or basketball lines?
Multi-sport use can be planned, but extra lines, posts and equipment should not interfere with tennis or create hazards. Confirm line colors, surface compatibility, anchors and governing-body restrictions before installation.
Does a tennis court always increase property value?
No increase is guaranteed. Value depends on buyer demand, property size, condition, maintenance cost and local market. Treat the court primarily as a long-term recreational asset unless a qualified local valuer supports a financial assumption.
How long will a new tennis court last?
No responsible lifespan applies to every court. Soil, drainage, base, surface, climate, usage, maintenance and construction quality all matter. Ask bidders for system-specific references, warranty terms and expected renewal stages.