
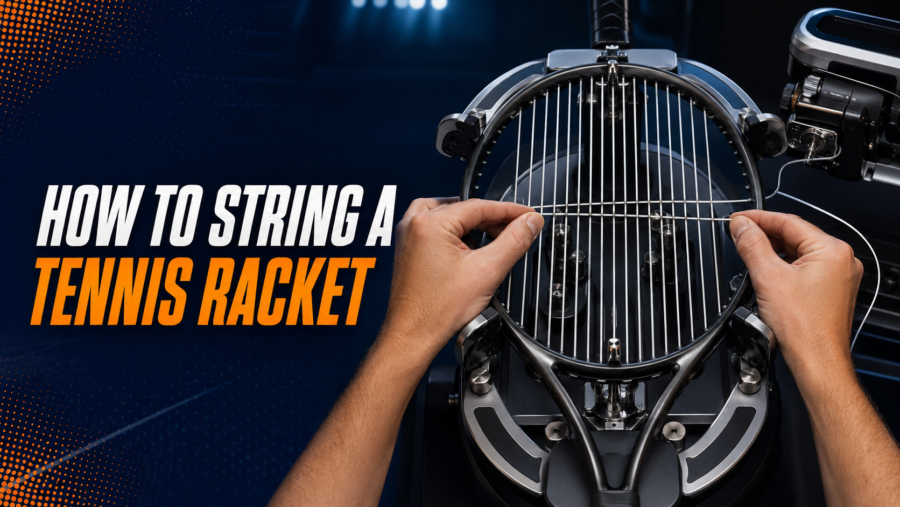
Stringing a tennis racket correctly is a controlled sequence: identify the exact pattern, inspect and mount the frame, install the mains evenly, weave and tension the crosses, tie off at the specified holes, and inspect the finished stringbed before removing the racket from the machine.
The exact route is not universal. Two rackets with the same 16×19 pattern can start their mains at different ends, skip different holes, use different tie-off holes, or permit different one-piece and two-piece methods. The manufacturer’s instructions for the exact model and generation must control every job.
This guide explains the procedure and the checks behind it. It does not replace the manual for your stringing machine or the pattern sheet for your racket. If either document is missing, or if the frame or grommets are damaged, a qualified stringer is the safer choice.
Before You Start: Find the Exact Stringing Pattern
Do not identify a pattern from the number of mains and crosses alone. Find the manufacturer’s sheet for the exact racket name, head size, string pattern, and generation.
A complete pattern normally tells you:
- whether the mains begin at the head or throat
- the number of mains and crosses
- which grommet holes the mains skip
- whether any holes are shared
- where the first and last crosses begin and end
- the designated tie-off holes
- the string lengths for one-piece and two-piece installation
- the manufacturer’s permitted tension range
Pattern sheets commonly use H for head and T for throat. For example, 8H means the eighth grommet hole from the center at the head. Count outward from the center on the relevant side, not around the entire frame.
If you cannot confirm the exact instructions, stop rather than copying a similar model. Cosmetic updates can hide pattern changes between generations.
What You Need to String a Tennis Racket
| Item | Purpose |
|---|---|
| Stringing machine | Supports the frame and applies a set reference tension |
| Correct racket pattern | Controls starts, skips, shared holes, lengths, and tie-offs |
| Racket string | A set or measured length suitable for the chosen method |
| String cutters | Cut old strings and trim tails cleanly |
| Needle-nose pliers | Help guide and handle short string ends |
| Starting clamp, if required | Supports certain starting and finishing methods |
| Awl or pathfinder tool, if appropriate | Helps manage blocked holes without forcing or damaging string |
| Eye protection | Adds protection while working with string under tension |
| Ruler or tape measure | Checks and divides string lengths |
Machines use different tensioners, clamps, and mounting systems. Learn the controls, maintenance checks, and safe hand positions from the machine manufacturer before working on a racket.
Preparation and Safety Checks
Inspect the frame and grommets
Clean the racket enough to see its condition. Check the hoop, throat, bumper guard, and grommet strip for cracks, deformation, sharp edges, collapsed tubes, or holes that no longer protect the string from the graphite.
Do not string a cracked or visibly distorted frame. A worn grommet can also cut a new string prematurely, so replace damaged protection before proceeding when the correct part and method are available.
Confirm the string and reference tension
Check the string type and gauge, then confirm the requested reference tension is within the range permitted for the exact frame. Polyester, multifilament, synthetic gut, natural gut, and hybrids should not automatically be installed at the same number.
If the starting number is uncertain, use the Tennis Racket String Tension Guide for the selection factors or the Tennis String Tension Calculator for an advisory estimate. The frame’s instructions still take priority.
Remove the old strings carefully
If the racket is fully strung, support it on a stable surface and cut the stringbed progressively in a balanced pattern, moving between opposite areas instead of cutting every main or every cross in sequence. The aim is to release stored load without leaving one side of the hoop carrying it for longer than necessary.
Remove the pieces without pulling sharp ends across the paint or grommets. Inspect the empty frame again once the stringbed is out.
Measure and identify the string sections
Use the manufacturer’s specified lengths. In a two-piece job, separate and label the main and cross sections before mounting. In a one-piece job, mark or measure the required short side accurately.
Do not assume a 12m set should be divided in half. The correct split depends on the racket and method, and some patterns need noticeably different main and cross lengths.
How to String a Tennis Racket Step by Step
The sequence below applies to a conventional lockout or constant-pull machine, but the controls and clamp procedure must follow your machine’s manual.
1. Prepare the machine
Set the machine on a stable working surface. Check that the tensioner, clamps, mounting posts, and supports move correctly and are clean enough to hold without slipping.
Set the requested reference tension and confirm the unit is correct. Pounds and kilograms are not interchangeable: 1kg is approximately 2.2lb. If accuracy is in doubt, have the machine checked or calibrated according to its manufacturer rather than compensating by guesswork.
2. Mount the racket without distorting it
Center the frame in the mounting system and engage every required support. The supports should prevent movement while allowing the hoop to retain its normal shape.
Snug the mounts in the order specified by the machine manufacturer. Do not use the supports to stretch the frame wider or longer, and do not overtighten them against the graphite. Recheck that the racket is centered and stable before pulling tension.
3. Locate the center main holes
Use the racket’s bridge and center markings, together with its pattern sheet, to identify the center pair of main strings. Confirm whether those mains begin at the head or the throat.
Feed the string through the correct center holes so the two sides are distributed as specified. For a one-piece pattern, confirm which side is the short side before making the first pull.
4. Tension and clamp the center mains
Pull one center main at the set reference tension, then clamp it according to the machine’s starting procedure. Establish the opposite center main and clamp it securely before continuing.
The exact first-pull method varies with fixed or floating clamps and with the use of a starting clamp. Follow the machine manual so the first strings are held without damaging the frame or losing unnecessary tension.
5. Install the remaining mains evenly
Work outward from the center, alternating between the two sides often enough to keep the loading balanced. Pull and clamp one string at a time. Keep each clamp close enough to the frame to limit drawback, but not against the grommet or frame.
Follow every skipped or shared hole on the pattern sheet. Do not force a main through a hole assigned to a cross. Before reaching the outside mains, count the strings on both sides and verify that the route remains symmetrical.
Avoid kinks while handling the string. Polyester can retain sharp bends, multifilament can fray, and natural gut requires particularly careful handling around tools and blocked holes.
6. Finish and tie off the mains
After the final main on each required side is tensioned and clamped, route the tail to the manufacturer’s designated tie-off hole. Use a recognized finishing knot suitable for the available space and your stringing method.
Tighten the knot against the anchor string without crushing the grommet, cutting the string, or pulling the knot into the frame. A tie-off is not a substitute for the machine tensioner, and adding arbitrary extra tension to the last string can overload that area.
7. Start the crosses at the specified end
The pattern sheet controls the cross starting point. Many two-piece patterns begin crosses at the head, but this is not a universal rule. Do not string from the throat upward unless the manufacturer authorizes that direction or supplies an approved alternative pattern.
Secure the first cross using the designated starting method and hole. A starting knot, starting clamp, or other procedure may be required depending on the pattern, string, and machine.
8. Weave each cross over and under the mains
Weave the cross across the stringbed, alternating over and under each successive main. The next cross must reverse the sequence. Pull most of the slack through before drawing the final loop across the mains to reduce friction and surface damage.
Keep the string moving rather than dragging one hot contact point repeatedly across a main. This matters especially with natural gut and delicate multifilaments, but friction damage can affect any string.
Before tensioning, check the entire weave. A misweave is easier to correct before the tensioner is engaged.
9. Tension and straighten the crosses
Tension one cross at a time and clamp it before moving to the next. Guide the cross toward its final position while tension is being applied, keeping fingers away from the tensioner and clamp path.
Cross strings tend to bow toward the previous cross. Straightening them as the job progresses produces a cleaner, more even stringbed than trying to move every cross after the racket is complete.
When a cross hole is blocked by a main string, use the planned route and an appropriate tool or scrap-string technique. Do not drive a sharp awl into an occupied hole where it could split the installed string or damage the grommet.
10. Tie off the final cross
Install and tension the last cross, clamp it, and tie it at the specified hole. Check that the knot is seated, the tail is trimmed without being cut flush to the knot, and no sharp end can contact the player’s hand.
Do not substitute a convenient nearby hole if the correct tie-off is hard to reach. Recheck the pattern and clear the intended route safely.
11. Inspect the stringbed before releasing the frame
While the racket is still supported, count the mains and crosses. Check for missed holes, doubled weaves, misweaves, badly notched strings, loose knots, clamp damage, and strings trapped outside the bumper or frame.
Compare the hoop with its original shape and make sure no support has loosened. Correct only issues that can be addressed without unsafe re-pulling or improvisation.
12. Remove the racket from the machine
Release the mounting system in the sequence recommended by the machine manufacturer. Support the racket as the final mounts are loosened so it does not drop or twist.
Record the racket, string, gauge, main and cross tensions, method, machine, and date. That information is essential when evaluating the result or repeating the setup.
One-Piece vs Two-Piece Stringing
| Method | Basic layout | When it makes sense | Main caution |
|---|---|---|---|
| One-piece | One continuous length forms mains and crosses | The exact racket has an approved one-piece pattern | Short-side length and cross direction must be correct |
| Two-piece | Separate lengths are used for mains and crosses | The manufacturer specifies it, or the setup is a hybrid | Requires four knots and the exact start and tie-off holes |
A hybrid always needs separate main and cross strings, so it is a two-piece installation. Some manufacturers or exact models also require two-piece stringing even with the same string throughout.
Do not convert a pattern simply to reduce the number of knots. An unauthorized around-the-world route or bottom-up cross sequence can place load on the frame differently from the published method.
How to Read a Manufacturer Pattern: One Verified Example
The following example shows why the exact sheet matters. It is not a pattern for other rackets.
| Detail | Wilson Ultra 100 v5 published instruction |
|---|---|
| Pattern | 16 mains x 19 crosses |
| Main start | Throat |
| Skipped main holes | 8H and 8T |
| One-piece length | 38ft / 11.6m |
| Two-piece lengths | 20ft / 6.1m for mains and 20ft / 6.1m for crosses |
| Published tension range | 47–57lb / 21–26kg |
Even within one model, the one-piece and two-piece instructions use different starts and tie-off arrangements. Copying only the pattern count would omit the information needed to complete the job correctly.
Common Stringing Mistakes
Using instructions for a similar racket
Model names, head sizes, and generations can look nearly identical while using different holes or tie-offs. Match all three before starting.
Mounting too loosely or too tightly
A loose frame can move under load. Excessive support pressure can distort or mark it. The correct setting holds the unaltered frame securely.
Losing track of skipped or shared holes
Mark the relevant holes on a printed pattern or inspect the route before pulling the outside mains. Improvising after a hole is blocked increases the chance of string or grommet damage.
Letting clamps slip or crush the string
A clamp that is too loose loses tension; one that is too tight can flatten or mark the string. Adjust and clean it according to the machine manual, then test its hold on scrap string when appropriate.
Misweaving a cross
Look across the stringbed after every few crosses. Adjacent crosses should alternate their over-under route at each main.
Applying the same tension to every material
Reference tension must account for the exact frame, string construction, and player’s established setup. The Complete Guide to Choosing Tennis Strings explains material differences without turning this procedure into a string buyer guide.
Treating a completed job as permanent
Strings lose tension, notch, fray, and eventually break. The appropriate interval depends on material, use, and performance change; see How Often Should I Change Strings On My Tennis Racket? for that decision.
When to Use a Professional Stringer
Use a qualified stringer if the frame or grommets are damaged, the exact pattern cannot be verified, the machine is unfamiliar or unreliable, a natural-gut job is beyond your experience, or a blocked hole cannot be cleared without force.
Professional help also makes sense when a player needs two rackets matched closely. Different machines, clamp condition, technique, and time off the machine can make the same reference number produce a different result.
Final Stringing Checklist
- exact model and generation confirmed
- official pattern followed
- requested tension within the frame’s permitted range
- frame and grommets inspected before mounting
- mounts secure without visible distortion
- mains installed from the correct end and balanced across the hoop
- all skips, shared holes, starts, and tie-offs verified
- every cross alternates correctly
- strings and grommets show no obvious tool damage
- mains, crosses, string, gauge, tension, method, and date recorded
The repeatable part of stringing is not a single universal route. It is the discipline of following the exact documents, keeping the frame load balanced, checking each stage, and recording the finished setup.